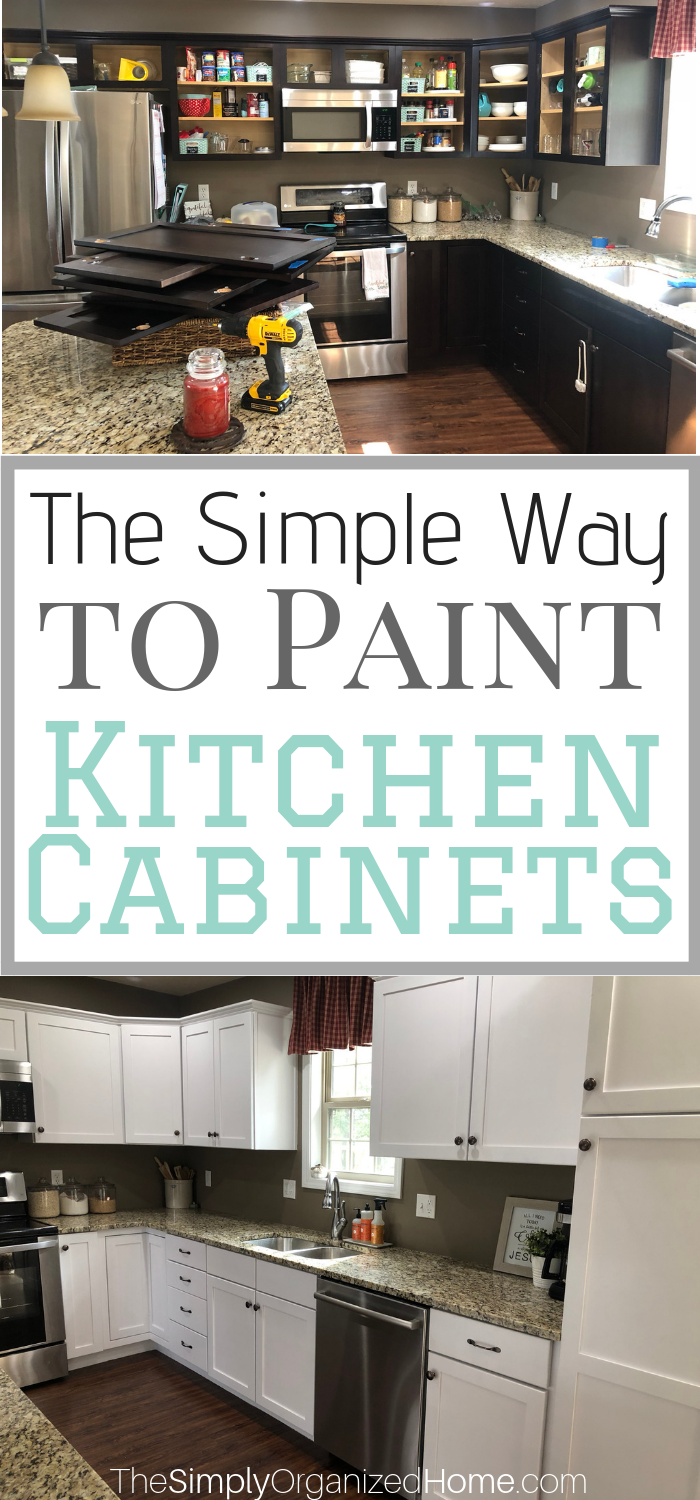
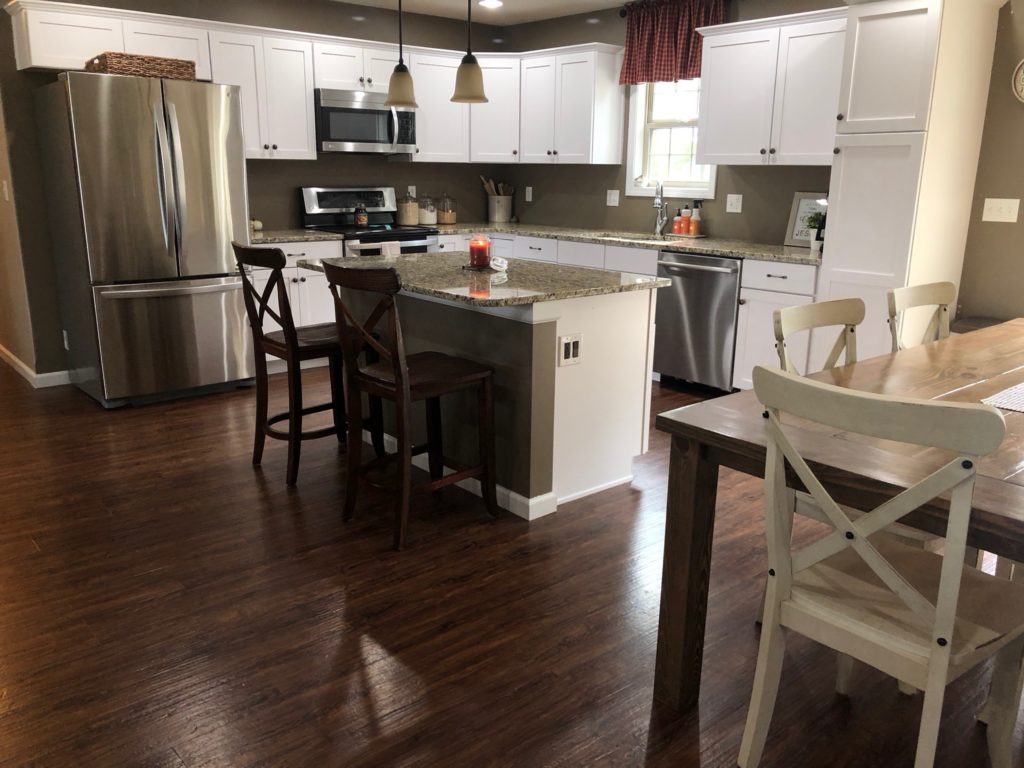
If you’re considering painting your kitchen cabinets, then you know that it can feel like a daunting task. There are so many options to consider and the time it takes can feel a little overwhelming. But it’s also such a great way to update your kitchen on a tight budget. Today I’m going to teach you the simple and easy way to paint kitchen cabinets without breaking the bank or spending months completing the project!
This post contains affiliate links for your convenience. Click here to read my full disclosure policy.
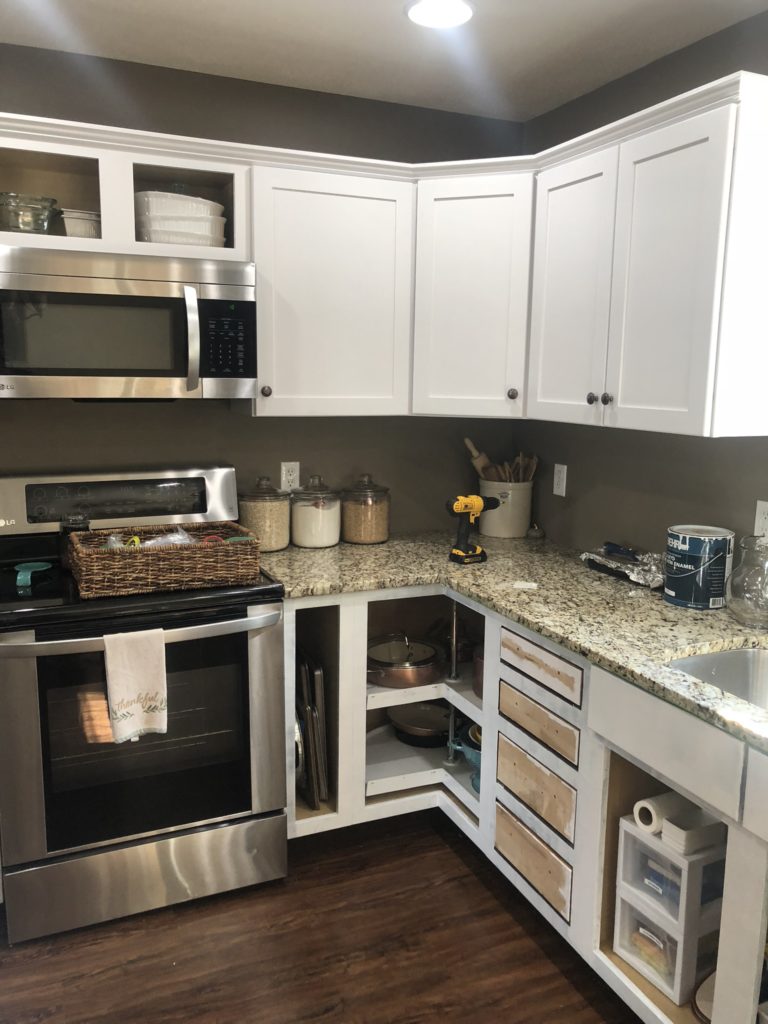
Let’s start by talking about the logistics of this project. I completed my entire kitchen from start to finish in 8 days and spent a total of $80. I have an average-sized kitchen with a decent amount of kitchen cabinets. You might spend more or less than I did depending on the size of your kitchen and the amount of paint you need to purchase.
I’m a fairly fast painter. I did most of my painting during nap time or while my son was riding his bike on our driveway while I was working in the garage. I had full day of painting where I was able to spend about 7 hours completing as much as I possibly could thanks to wonderful grandparents! If all you have to devote to painting each day is an hour or two it will likely take you at least 2 weeks or longer. Be prepared for this before you begin.
What you need:
- DeGlosser
- Krud Kutter
- Rubber Gloves
- Paper Towels or an Old T-shirt
- 220 Grit Sanding Block
- Behr Alkyd Paint in Satin Finish
- 2″ High-Quality Angled Brush (Wooster or Purdy)
- 4″ Roller Kit
- Cabinet Door Bumpers
Cabinet Painting Tips
This is my second time painting kitchen cabinets and both times I’ve acquired new tips that have made this process easier and given me a better finish on my cabinets in the end.
-
Use Quality Products.
Make sure to research the products you are using beforehand. It doesn’t matter if you are a wonderful painter. If you use subpar products, your cabinets won’t turn out well. Make sure your paint and brushes are made to be used on kitchen cabinets. (The Alkyd paint is suggest is specifically made for this project.)
-
Work in Sections.
Instead of trying to take down every single cabinet door and drawer, I suggest you work in a few small sections. This will help you kitchen to still be semi-functional during the entire process. I broke mine up into 3 sections, but you can do as many as you want. Just remember each section will need to be painted 2-3 coats on the cabinets, front, and back of doors. It will likely take you at least 3 days per section.
-
Use your Roller as Much as Possible.
You will have to use your brush to get into tight spots and crevices. However, to avoid brush lines roll over everything you can with the roller. I liked to work one cabinet or door at a time. Complete all the brush necessary, then roll on the paint everywhere else. Be sure to roll over as much as the brush strokes as you can. This will help to give you the smoothest finish possible without the use of a paint sprayer.
-
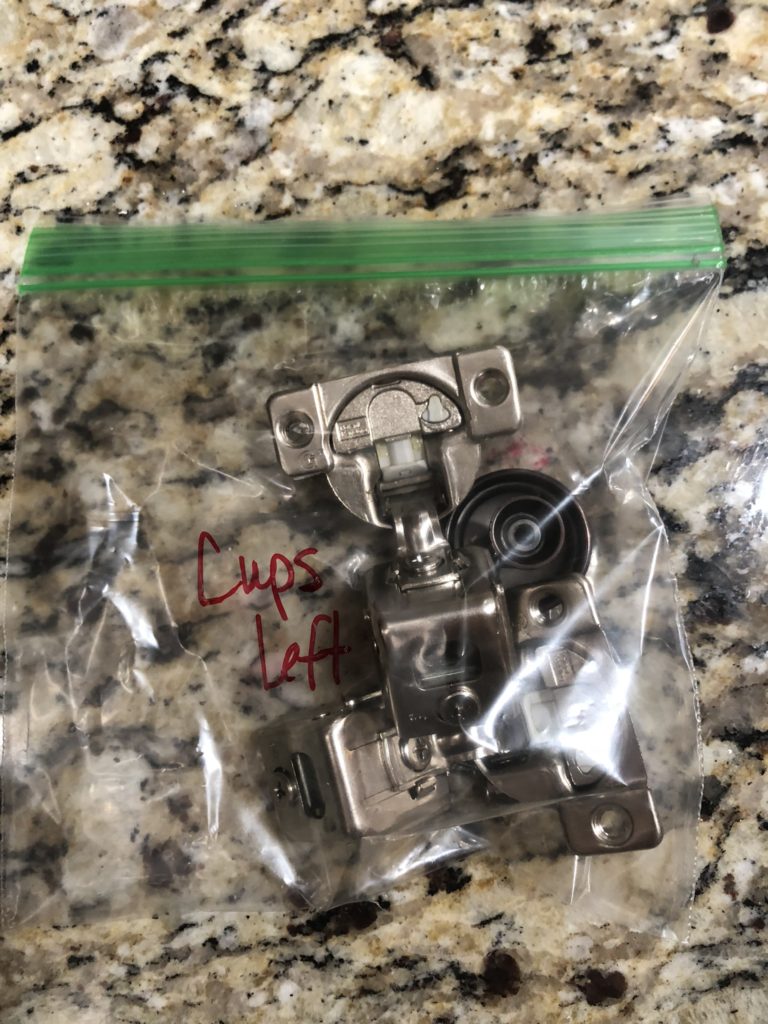
Organize Your Cabinet Hardware.
Place all the hardware for each door or drawer into a plastic zip top bag with a label. This includes hinges, screw, and the knob or handle. Hinges tend to have “muscle memory” so to speak. You want to make sure you pair the same hinges with the same door or else you might find your cabinet doors won’t shut properly once everything is done.
-
Avoid Drips.
Drips can make a finish go from smooth and professional to ugly and terrible. You want to avoid them as much as you possibly can. I would encourage you to paint in small sections and then give everything a good look before you move on. Make sure to roll over drip marks to avoid brush strokes.
-
Label, Label, Label.
Place labels on the cabinet doors or drawers. I found that naming them with what I stored inside worked best. I had labels like “Baking Cabinet Left” and “Cup Cabinet Right.” Make sure it makes sense to you. Place a label with painters tape on the door before you remove it. Then once you have it in your painting location, place the label right next to the door. This will help you put the doors back where they go, especially if you have doors that are the same size for different cabinets.
-
Create a Painting Station.
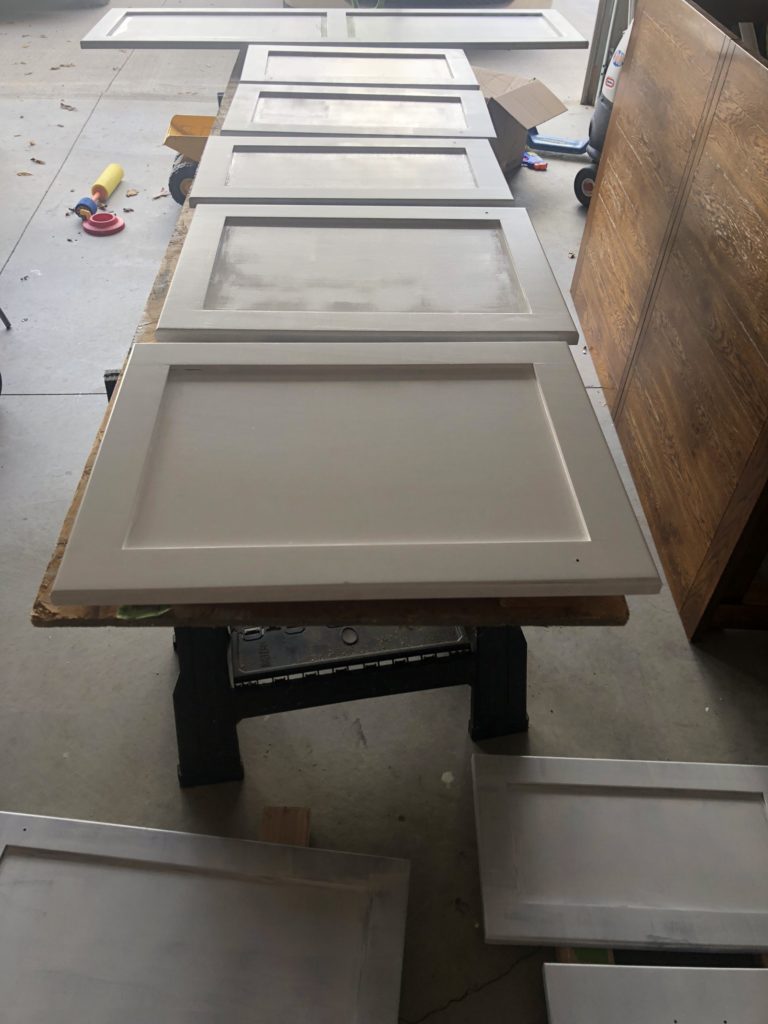
If you have the room in a basement or garage, I highly recommend setting up a painting station. This could be on a work table or even on the floor. No matter where it’s at, I recommend placing 2×4 boards underneath all of your cabinet doors and drawers. This will allow for proper ventilation under the cabinets so that everything dries well.
-
Use a Satin Finish Paint.
You want something that is wirable so you can easily clean off any food splatters or drips. But if you’re anything like me, you don’t want it to look “shiny.” I made the mistake of using a semi-gloss the first time I painted cabinets. They had a shine to them that I wasn’t very fond of. This time around I decided to use a satin finish paint. This has made all the difference. It’s not shiny, but still very easy to clean!
How to Paint Kitchen Cabinets: Step-by-Step Instructions
1. Create a Plan
Staying organized during this process is crucial. Decide the sections you plan to work in and then decide which one you want to start with. This plan will be your guide throughout the project. It will help you always know where you should spend your time working.
2. Remove All Hardware from Doors
Using a drill, remove all the hinges, knobs, and handles from the first section of cabinets. Place each door/drawer’s hardware into a labeled baggie. Label the door/drawer with the same name using painters tape.
3. Thoroughly Clean Cabinets, Doors, and Drawers
Spread out your cabinet doors and drawers in your designated work space. I used a section of our garage. Place the labels right next to the doors and drawer faces before you get started. If you are painting cabinets that have seen any bit of wear and tear, use Krud Kutter to thoroughly clean away any grease or grime. Use a lint free rag or high-quality paper towel to do this on all of the cabinets, doors, and drawer faces. You will want to wear rubber gloves during this process.
4. Use DeGlosser
Cabinets generally come with at least a soft sheen so they are easy to clean. This needs to be removed so that the paint will easily adhere to the cabinets. I’ve found that Liquid DeGlosser (also sometimes knows as liquid sandpaper) is the best way to do this. I used a paper towel to thoroughly scrub all of my cabinets, doors, and drawers. Work in sections and make circular motions to get the best results.
5. Use Paint Brushes in Corners and Crevices
Once your cabinets have dried, it’s time to get started with painting! You will need to get 2-3 coats of paint on your cabinets as well as 2-3 coats on the fronts AND backs of your doors and drawers. I suggest starting with the backs of your doors. Using a paint brush get into any tight corners or crevices. Only using the paint brush for easy to reach areas. Paint with the grain of the wood.
6. Utilize Your Roller
Once you’ve painted a small section with the paint brush, it’s time to roll over it. Using a 4″ foam roller, roll on paint in a smooth and consistent motion. Try to make all of your roll strokes in the same direction. Cover all of the brush strokes as much as you can to avoid brush strokes being visual when finished.
7. Paint Back of Doors and Drawers
You will want to start by painting 2-3 coats on the backs of your doors. Let that dry thoroughly (at least 24 hours if not more depending on the humidity.) If the doors feel even remotely sticky, do not flip them over. Starting on the back ensures that any mistakes or chips will be hidden on the inside of the cabinets. We will fix those at the end!
8. Sand Edges
Before you start painting the front of the doors and drawers, sand the edges. There might be a few drips on the corners. You want to remove these with a 220 Grit sanding block to ensure you maintain the smooth finish.
9. Paint Fronts of Doors and Drawers
Once the back of your doors and drawers are completely dry, it’s time to flip them over. After sanding the edges, paint them in the same manor as before. Brush in tight spaces, then follow up with your roller. Work one door or drawer at a time. Make sure to thoroughly check your work for drips.
10. Painting Cabinet Faces
You only need to paint the cabinet faces. However, you can definitely paint the interior of your cabinets if you wish. I just want to prepare you for how much work that will be! This will add on several days of work. If you are just painting the cabinet faces, I recommend painting the inside lip of the cabinets as well.
Make sure to follow the same tips as above. Use your brush for any tight spaces or crevices and then roll over everything with your paint roller. Work in small sections (preferably 1 cabinet at a time) until you’ve completed the entire section of cabinets you are currently painting. It was recommended to wait 24 hours between coats. However, I found that it was completely dry after about 2 hours. Just make sure you do what you feel is best.
11. Let Everything Dry Thoroughly
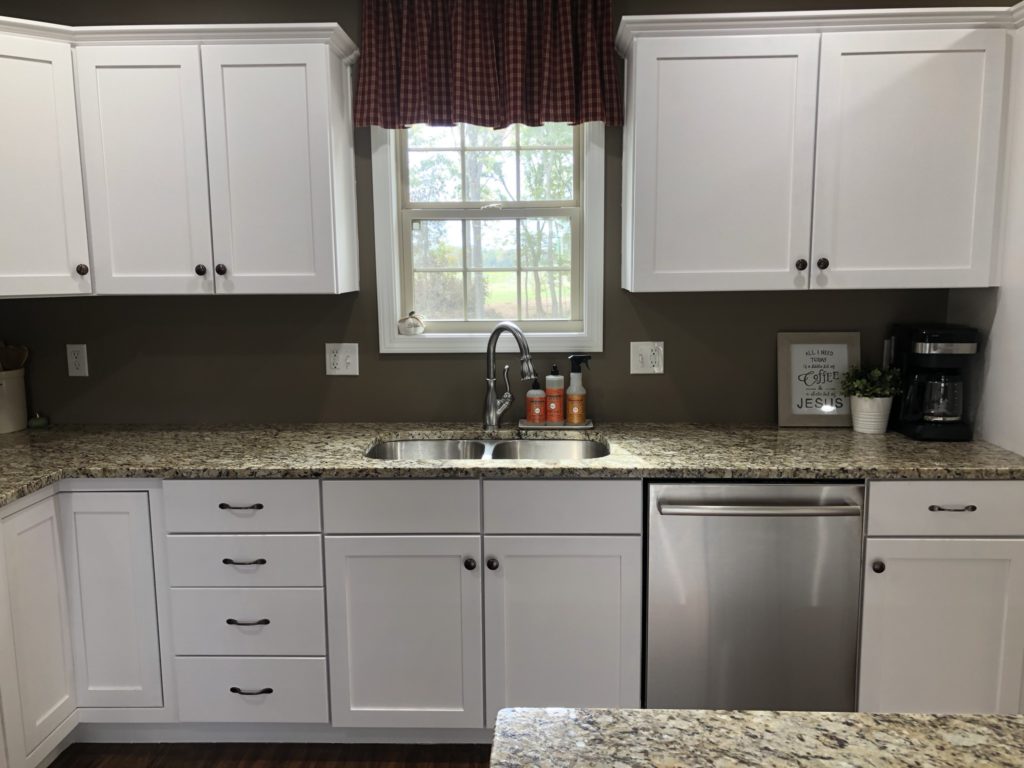
I let everything dry at least 24-48 hours before re-hanging the doors. It helps if you have two people for this step. Use your labeled bags of hinges, knobs, and handles. This will make this step so much easier! Be careful as you hang your cabinets. The paint doesn’t completely cure for approximately 30 days. You will might end up with a few chips.
12. Be Prepared for Touch-ups
Make sure you have a little bit of paint leftover. Using a roller or foam paint brush, touch up paint about 30 days after you’ve completed your project. The paint should be completely cured at this point. You should be able to lightly wipe them with a damp rag. Remember that these are painted cabinets. You will might need to do touch-ups on them once or twice a year. That’s just the reality of painted, heavily used cabinets.
IMPORTANT NOTE: Please remember that everyone’s kitchen cabinets are different. My cabinets were a dark espresso color and were only 1.5 years old. What worked well for me might not work well for you. If you are painting older cabinets, make sure to thoroughly clean them as they have likely acquired a lot of grease and grime.
I hope you’ve found this tutorial helpful. If you have any questions about the products I used or the process I followed, feel free to comment below or send me an email at kaitlin@thesimplyorganizedhome.com! Make sure to head over to Facebook and follow The Simply Organized Home for real-life updates, tips and tricks, organizing and decluttering advice, and much more!
One of the easiest ways to make over your kitchen is to paint it over. Someone walks in and wow . Thanks for the painting tips, it could be annoying having paints all over the knobs and patches of paint on the floor . Great article.