*Please note that this post contains affiliate links. If you make a purchase through one of my links, I may receive a small commission at not additional cost to you. I only recommend products and services that I have used and loved. I appreciate you continued support.
When I first started blogging, I had absolutely no idea where to begin. I searched all over the web trying to find my way in this blogging world. I wish I had someone to hold my hand through it all because it was a lot of reading, research, and trial and error. I’m very much not a “techie” person so I promise if I can do it, so can you!
If you are anything like me, you don’t have a lot of money to invest in a blog upfront. I knew blogging was something I wanted to do (I contemplated it for over 4 years you guys!), but I just wasn’t sure I could justify investing a bunch of money in building a blog. While I knew I wanted to monetize my blog eventually, I just didn’t know when I would be able to recoup my investment.
Are you like me?
Well, I will show you how you can start a blog without breaking the bank too!
After a year of blogging, I have recouped my investment and I’m seeing a consistent part-time income coming in from my blog each month. Blogging is such a blessing to our family and something I am truly passionate about.
Are you ready to take those first steps? I hope so. I can’t wait to see where your new blog takes you!
I want to be very clear upfront. Starting a self-hosted blog isn’t free. You will need to invest a small amount of money in the beginning. It’s inevitable if you want to be self-hosted.
A NOTE ABOUT BEING SELF-HOSTED: Being a self-hosted blog means you will pay a hosting company to rent space on the web for your blog to live. You want to do this because this means you will own your content. If you decide to go with a free blog like blogger, then they own your content and can shut you down at anytime. I don’t know about you, but I don’t want to invest a ton of time and effort into something without being confident it’s not going to disappear. Hosting is definitely worth the investment.
You can find a few of my other favorite budget-friendly blogging resources here. I try not to promote overly expensive items unless I think they are 110% worth the investment. Every product or service I promote is something I have used.
Okay, let’s get started!
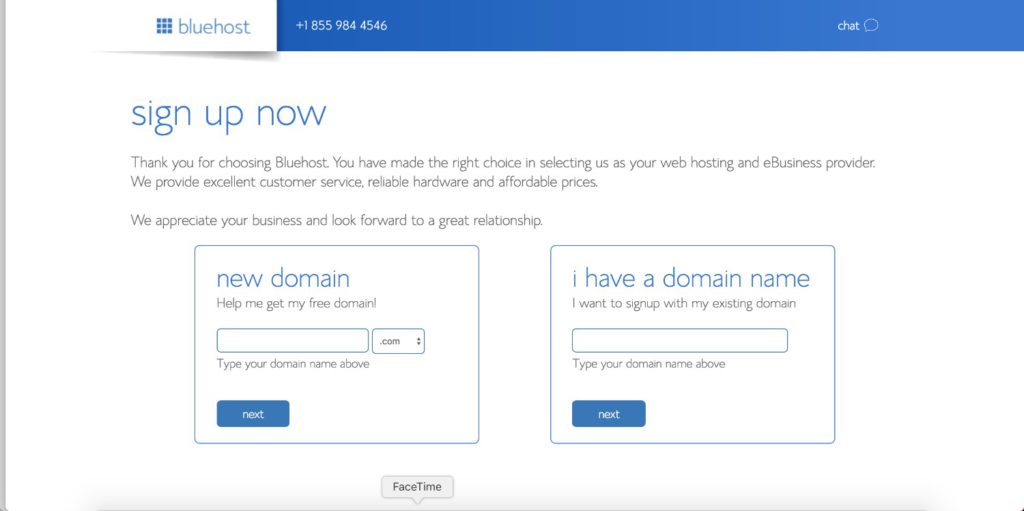
#1 Select a domain name and register it on Bluehost.
If you have been considering starting a blog, then you probably have a blog topic/niche in mind. If not, decide that first. Then, before you do anything else, it’s important to decide on a name. You will want to register your domain which you can do on Bluehost for free when you sign up for web hosting. You can navigate to www.themomonpurpose.com/bluehost and click the get start button to start setting up your web hosting.
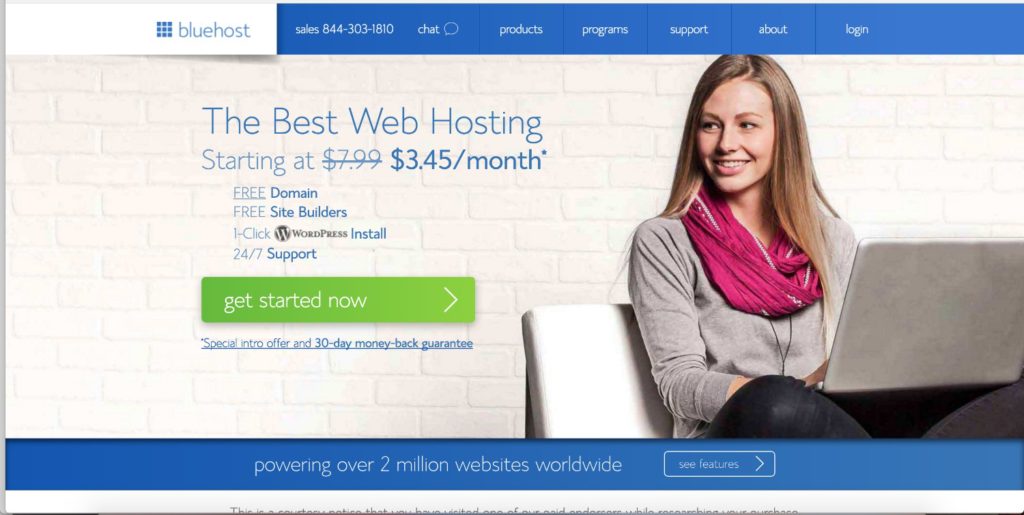
Then you will need to select the plan you want. I highly recommend starting with the basic package. I know there are many mixed reviews of Bluehost, but I have had a very wonderful experience with them for the past year. They let you upgrade your package at anytime. The basic package is great for beginning bloggers.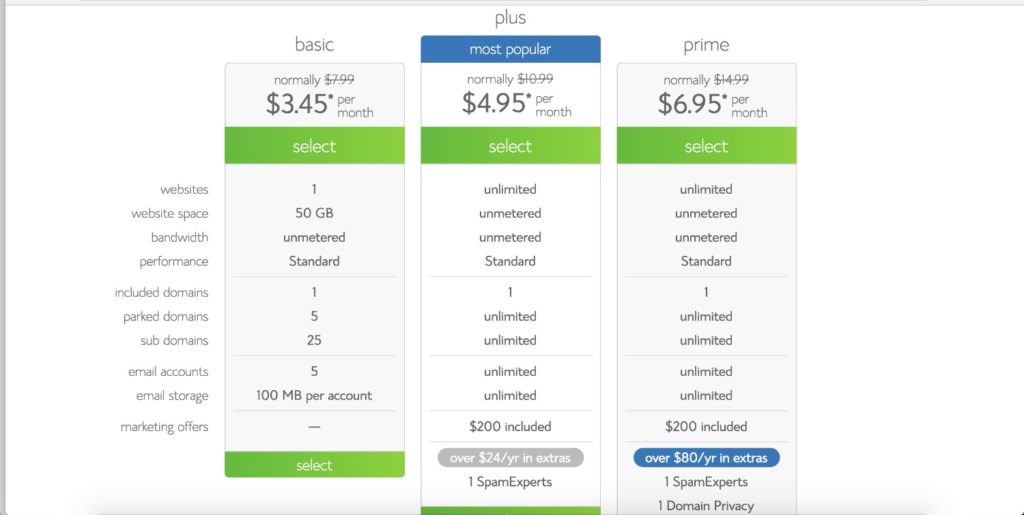
Once you’ve chosen your hosting plan, you will be able to register your domain. You will have the choose of deciding if you want a .com, .net, .org, etc. at this point as well. I highly recommend sticking with a .com if possible. If the domain you want is unavailable, you will have to choose another one. Don’t rush this process. Make sure to pick a domain that you love, fits with your personality and blog niche, and a name you won’t get tired of after a year. Try to choose something easy to remember so that your future audience will easily be able to come back for more of your content day after day! 🙂
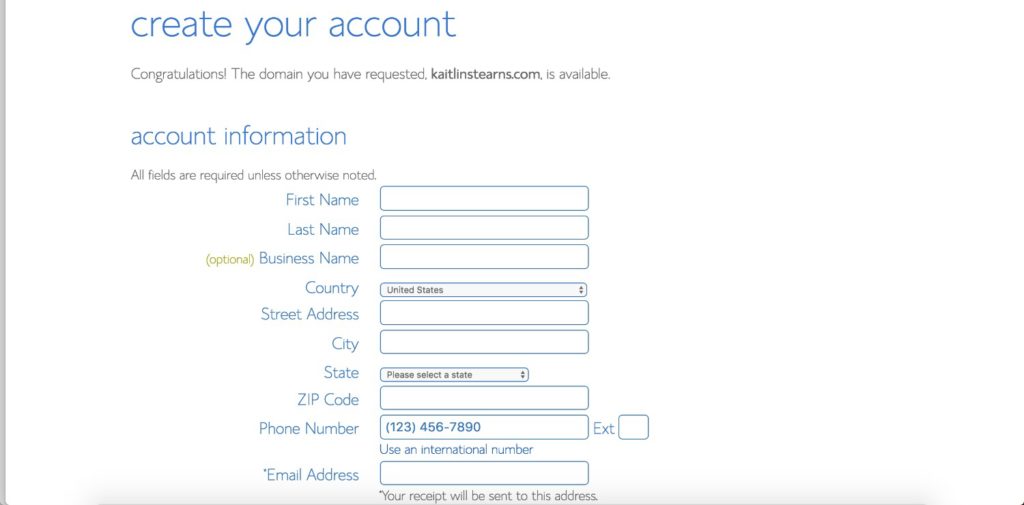
#2 Set up your web hosting with Bluehost
This part is simple. Just fill in your information accurately.
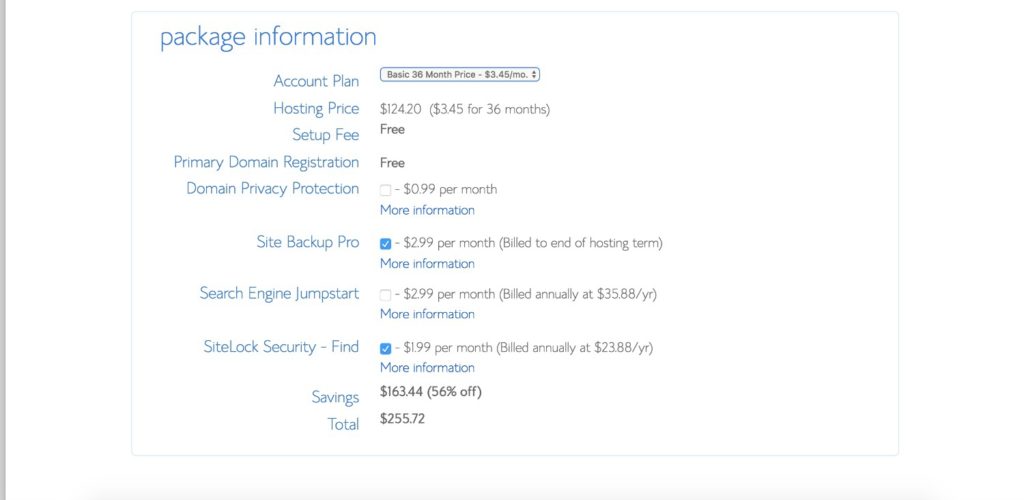
Once you get down to the package information, you are most likely going to want to un-click the Site Backup Pro, Search Engine Jumpstart, and SiteLock Security – Find. All of these are options you have, but extra expenses that I don’t feel are necessary…especially when you are on a budget!
You will also have the choice to pay for a 12 month, 24 month, or 36 month plan. You will save more per month when you commit for a longer term. If you are on a really tight budget, just go for the cheapest possible. However, I will mention that if you ever decide that blogging isn’t for you and you want to quit blogging, Bluehost will refund the remaining months on your package. So if you can afford the 36 month package, I would recommend it. You won’t get the great monthly prices when you renew so it’s best to take advantage of it when you can.
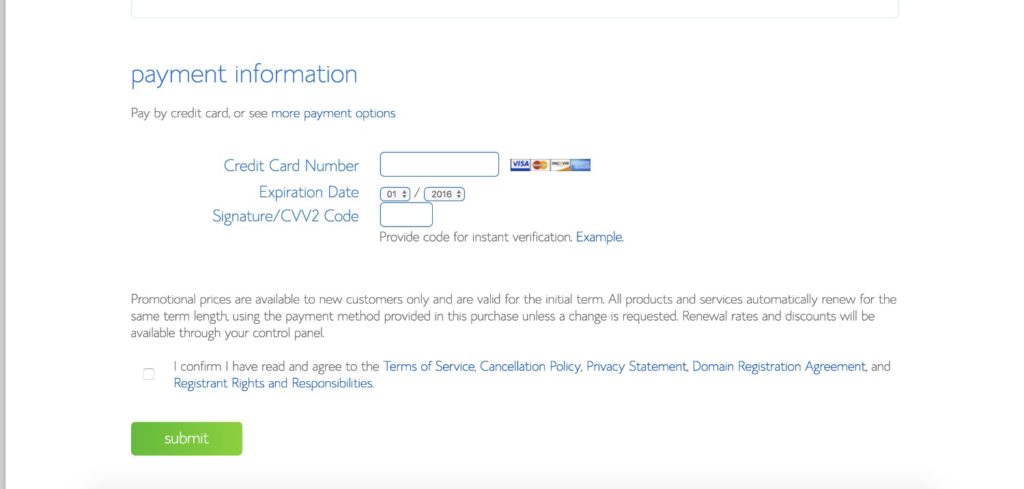
Finally you will need to enter your payment information.
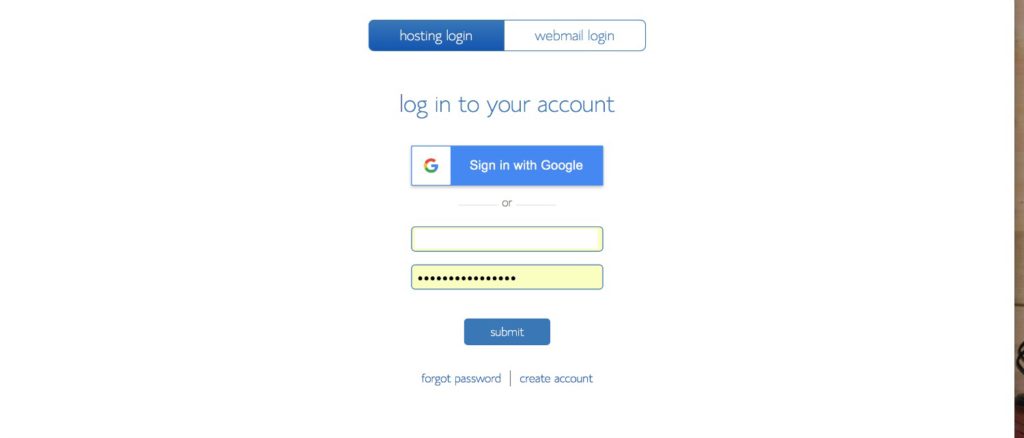
#3 Confirm you email and sign-in
Once your payment is processed, you be redirected to create a password. Then you can go to sign-in to your account. Congratulations! You officially have a Bluehost account! 🙂
Once you sign-in, you will be prompted to be walked through the set-up process. I did this and found it very helpful. The most important thing you will need to do though is to download WordPress which I will show you how to do!
#4 Download WordPress
When you get into your main dashboard on Bluehost, you will see a screen that looks something like this:
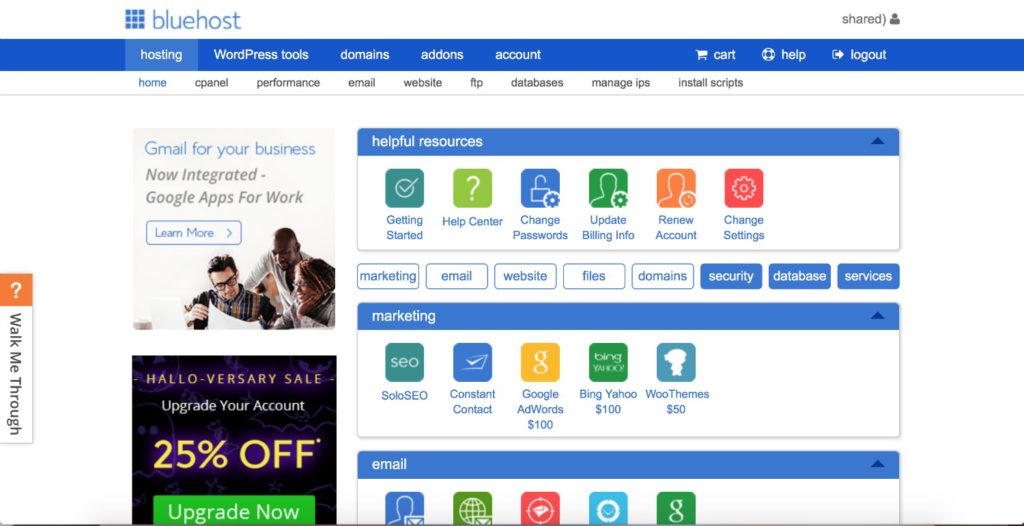
You will want to scroll down until you get to the section with the heading “website.” Your looking for the tab that says “Install WordPress.” Click on this button.
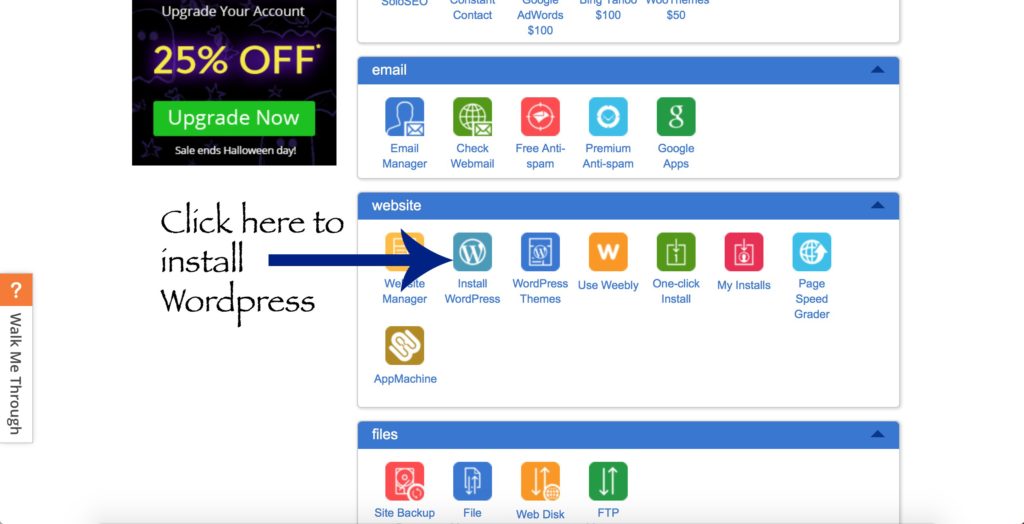
You will be prompted to install this to your computer. You will also need to create a username and password for wordpress. This is going to be a very important username and password as it will be what you will use to login into your blog dashboard and actually add content! Write this down, put it in your phone, or better yet, memorize it! 🙂 It’s super important!
#5 Start Blogging!
You will receive an email from Mojo Marketplace which will have your site URL as well as your Administrator URL. Click on the Administrator URL and then type in your username and password. Your dashboard will look something like this.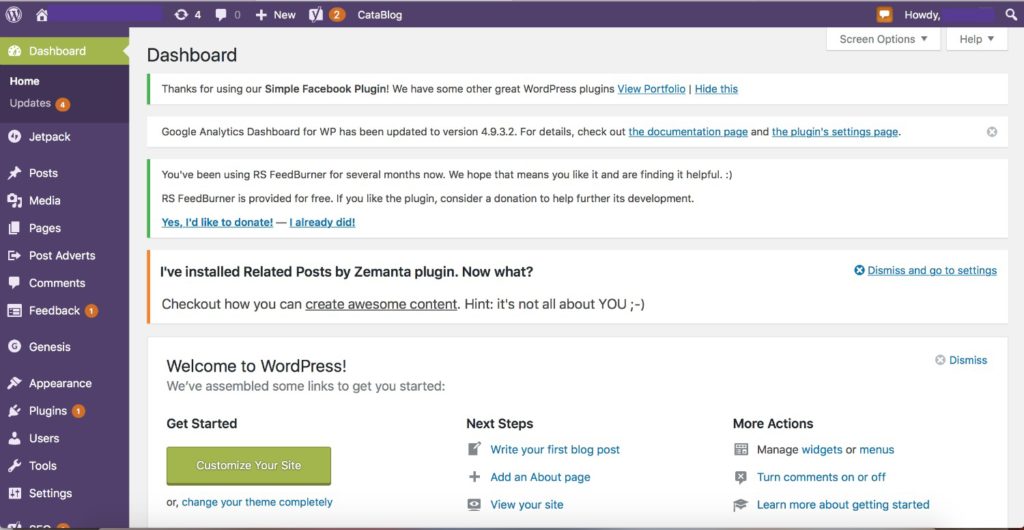
To write your first post, click the button at the top that says +New and click on Post. Congratulations! You officially have a blog!
You will spend a lot of time in your WordPress dashboard. This is where you will alter the appearance, layout, and pages on your blog. While all of this seems very complicated, I encourage you to check out Abby Lawson’s book, Building a Framework. It will walk you through how build a platform, create a community, and monetize your blog. It’s comprehensive and amazing. It was the second blogging purchase I ever made after registering my blog on Bluehost and it was the only thing that got me through those first few months. (You can find all of my other favorite blogging resources here.)
I’m so excited for you to start this journey! If you have any questions, I would be happy to help. Just shoot me an email at kaitlin@themomonpurpose.com.