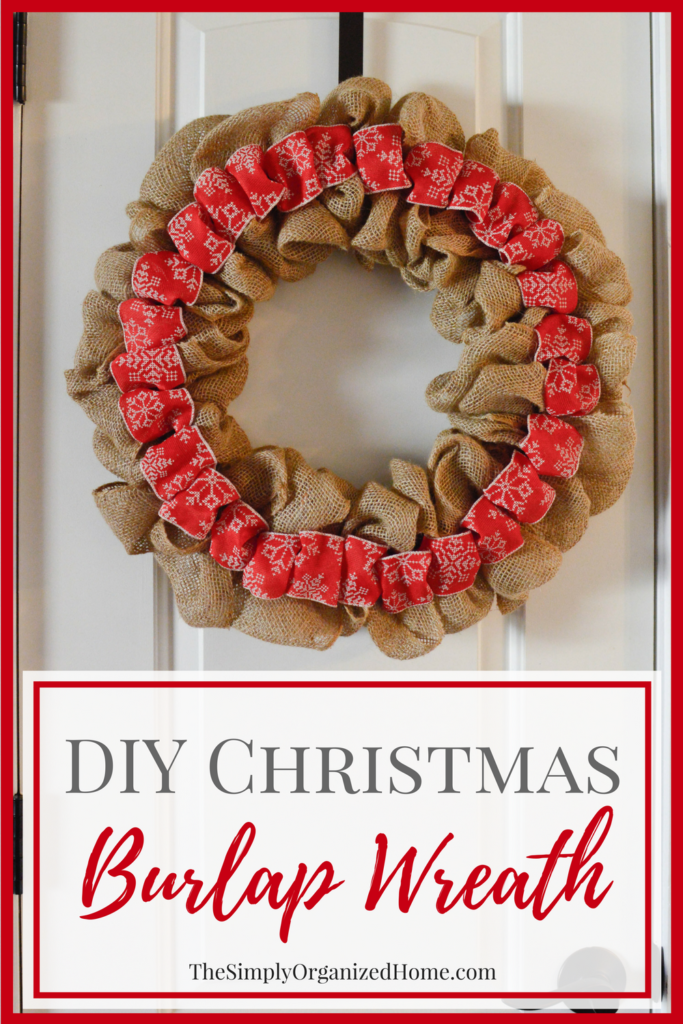
Don’t you love those burlap wreath’s you see all over Etsy? But, whoooooa! Those prices are enough to make a girl fall over in shock! I just can’t justify spending upwards of $100 on a seasonal wreath! But, if you’ve been reading here for any amount of time, you know I’m always up for a little DIY challenge! So I set out to DIY my own burlap wreath. But let’s get a little specific today because I’m in the holiday mood! You can find out how to make your own DIY rustic burlap Christmas wreath for just $15!
I will be honest. I’m a little obsessed with burlap wreaths. I have around 15 of them stored in my garage to go along with all of the season and holidays. (Okay, okay…a lot obsessed!) They are just so cozy and farmhouse-y…is that even a word?! Okay, well it is now! They are TOTALLY FARMHOUSE-Y!
And Joanna Gaines is kind of a big deal in this house so anything that relates to farmhouse or Fixer Upper is going to find a permanent home here!
So let’s get to the good stuff! Burlap wreaths are all over the internet these days, but they can be super expensive to buy and a little complicated to make. However, my tutorial today is going to be a bit different from most I’ve seen floating around Pinterest. You don’t need many supplies, but you do need a bit of time and an episode or two of a show you are currently binge watching on Amazon Prime![]() !
!
HOW TO MAKE A DIY BURLAP WREATH
WHAT YOU NEED:
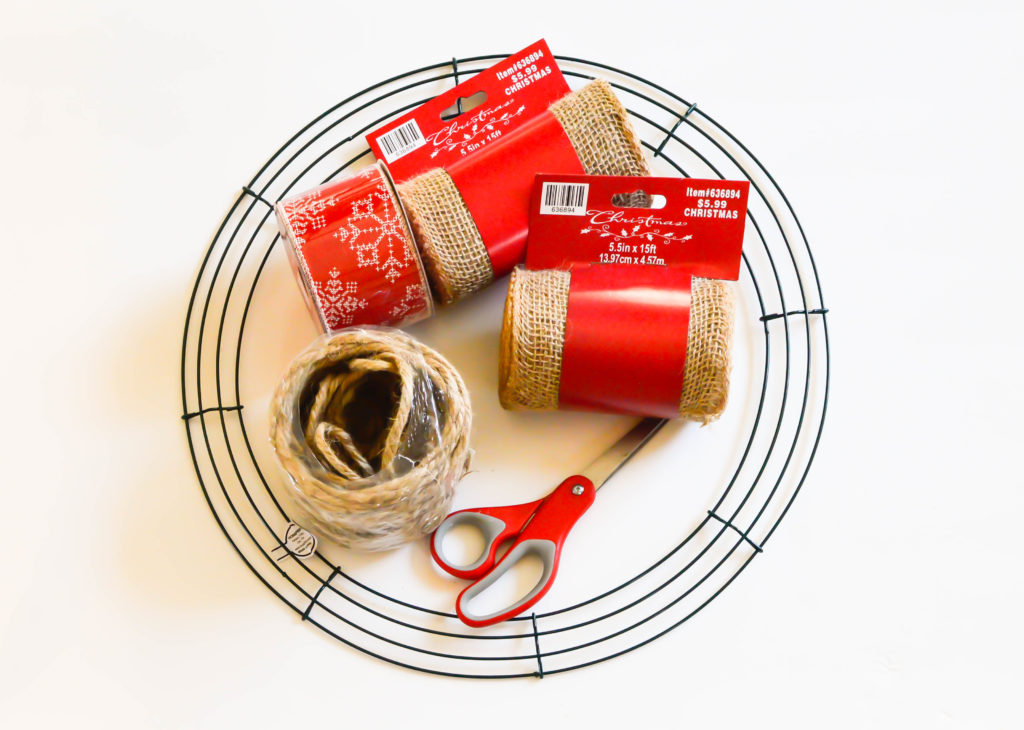
- Wire Wreath Form (I’m using a 16″ form, but you can use whatever size works best for you)
- 2 Rolls of Burlap (5.5-6″ wide and at least 30 ft in total length…more if you want a fuller wreath)
- 1 roll of burlap ribbon (2.5″ wide x 15+ ft long)
- Scissors
- Twine
While you can purchase all of these items on Amazon, I highly recommend checking out a local Hobby Lobby or Michael’s store and using a coupon to get a much better price. I was able to purchase two rolls of burlap, the burlap ribbon and the wreath form all for $15.
Directions:
#1 Tie the burlap and ribbon to the wreath frame.
First slice the burlap and ribbon down the center like shown in the picture below about 6 inches. This will create two smaller pieces so you will be able to easily tie it onto the frame.
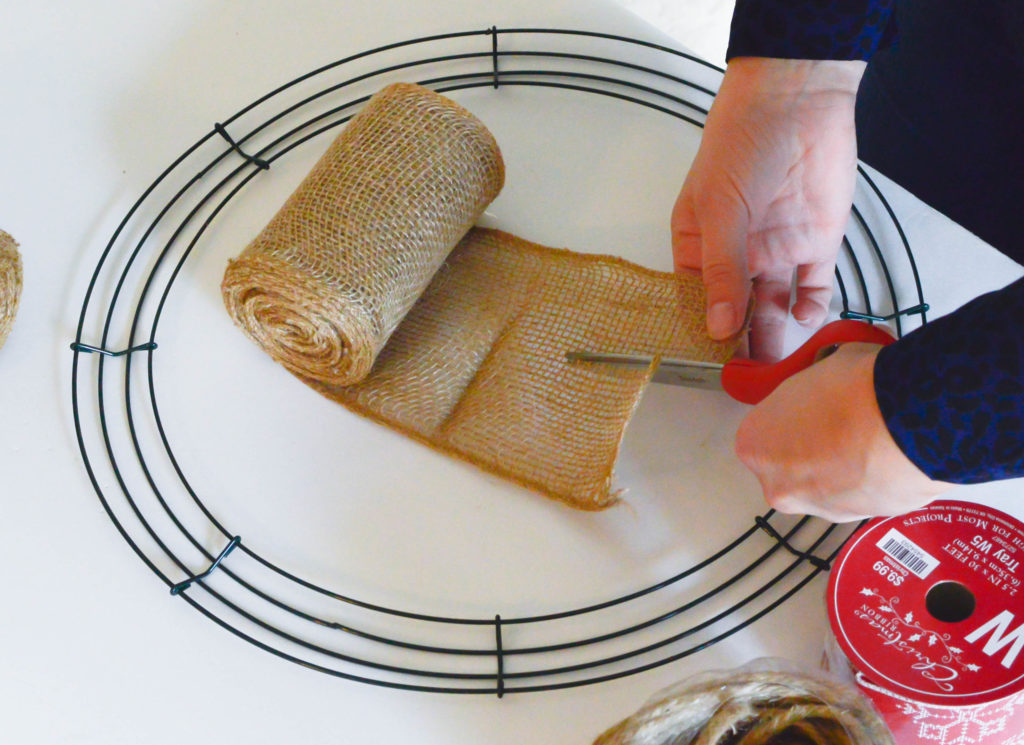
Then tie one piece of burlap to the outside edge, one piece of burlap to the inside edge, and the ribbon in between them. These knots should all be on the backside of the frame so once you start threading the ribbons through, they become hidden.
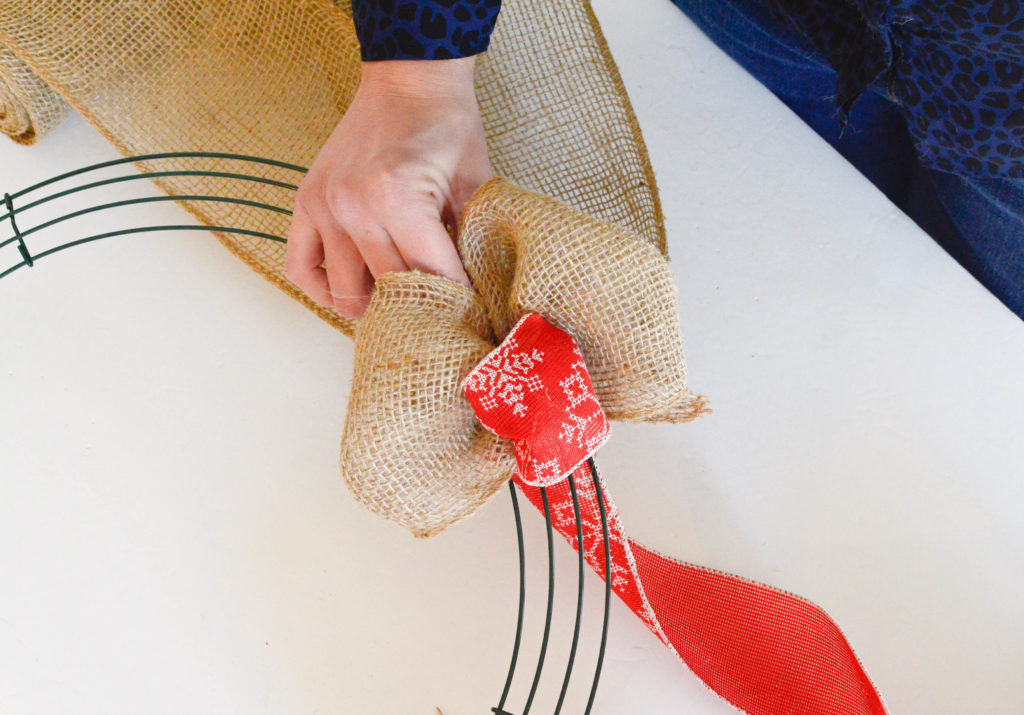
#2 Turn over the wreath and create a loop of burlap on the top and bottom and a smaller loop with the ribbon.
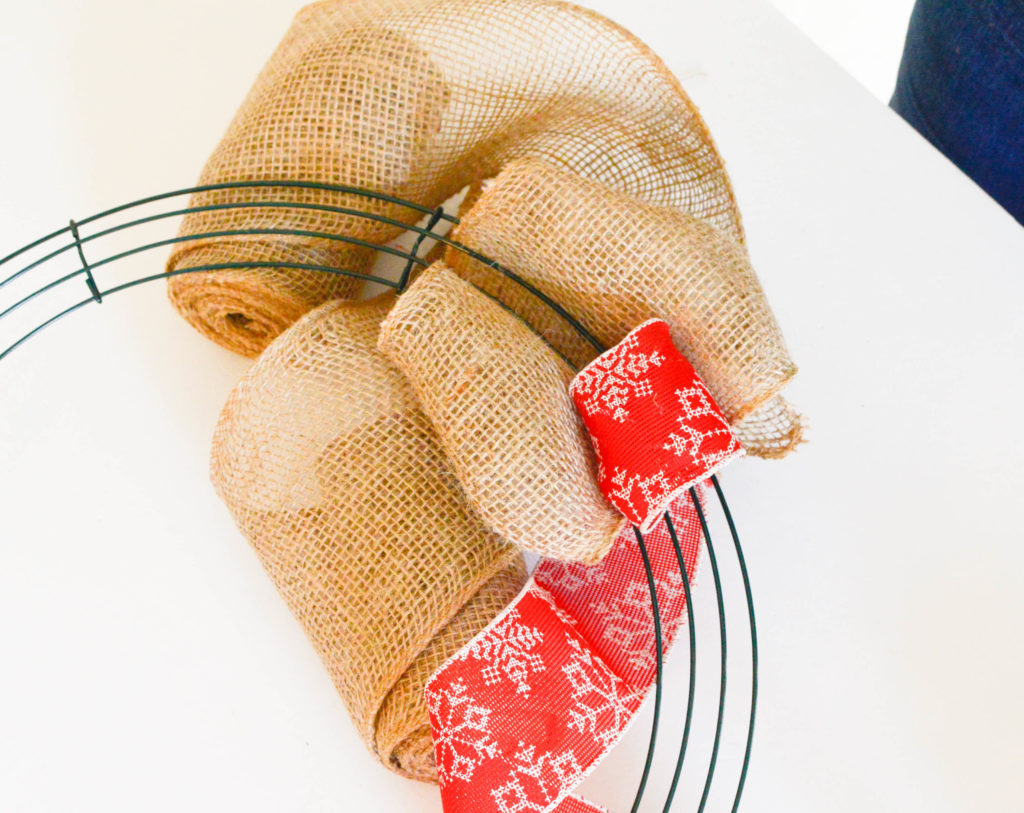
You will then need to use your fingers and squish those pieces together up against on of the wire framing pieces like the picture below. This is where you can adjust the fullness of your wreath. For fluffy wreaths pull more burlap through the frame. For a smaller, tighter wreath, make smaller loops.
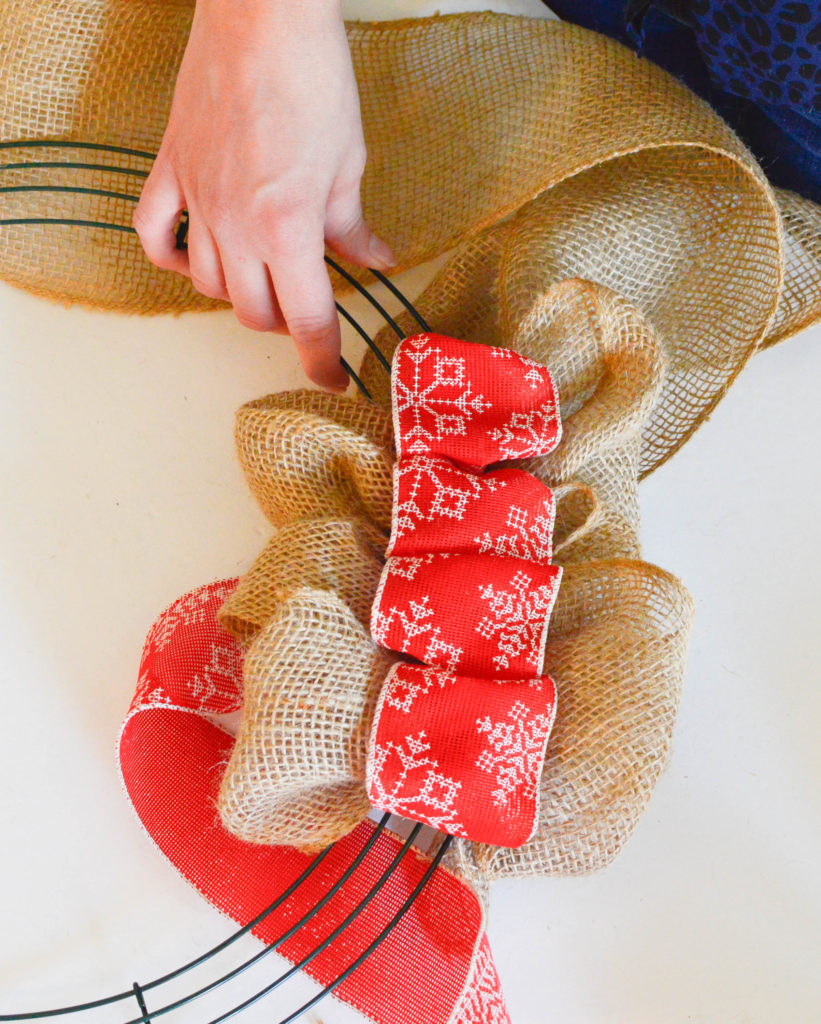
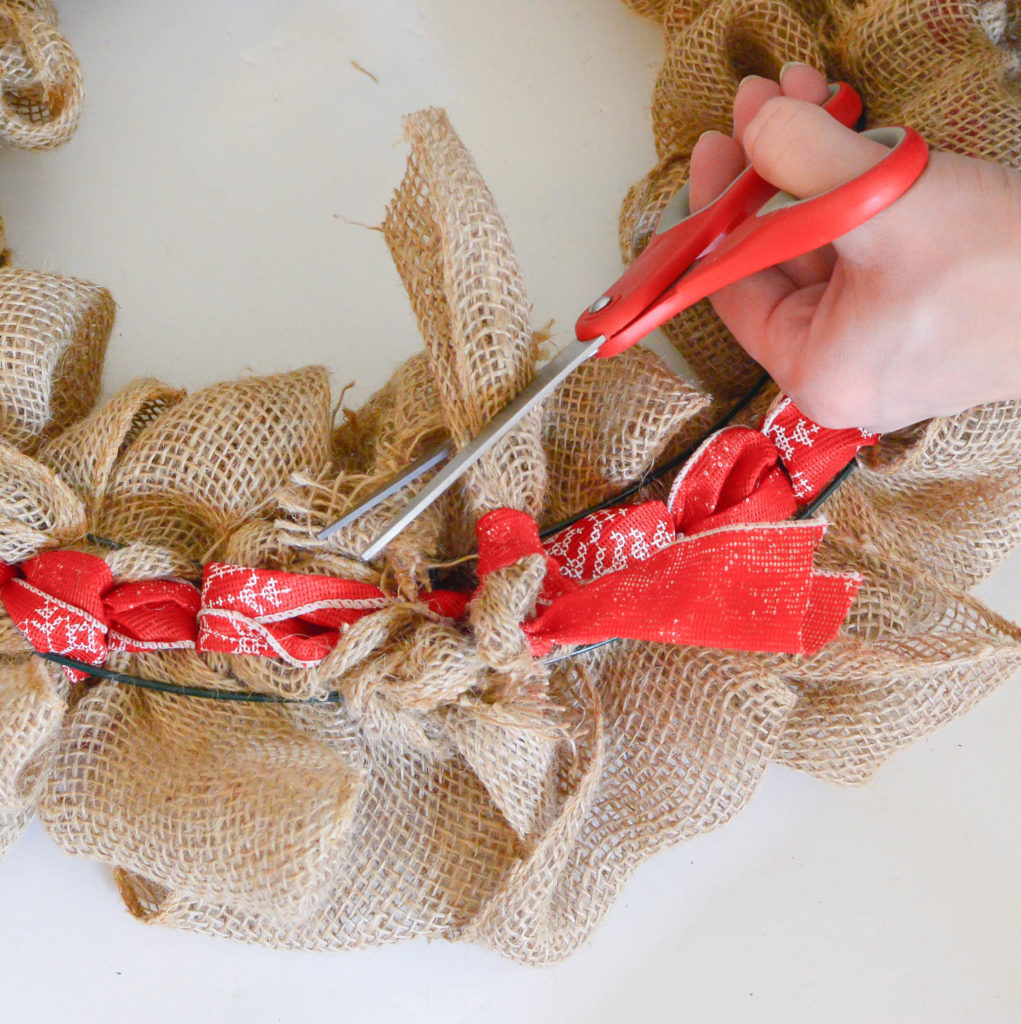
#3 Braid the ribbon pieces on the back.
Start by taking the top loop end to the bottom and creating a loop. Then take the bottom loop end to the top and create a loop. Then overlap the center ribbon and pull through to create another center loop. Use the diagram below if you need a visual aid.
By braiding the pieces on the back end, they will automatically lock everything into place.
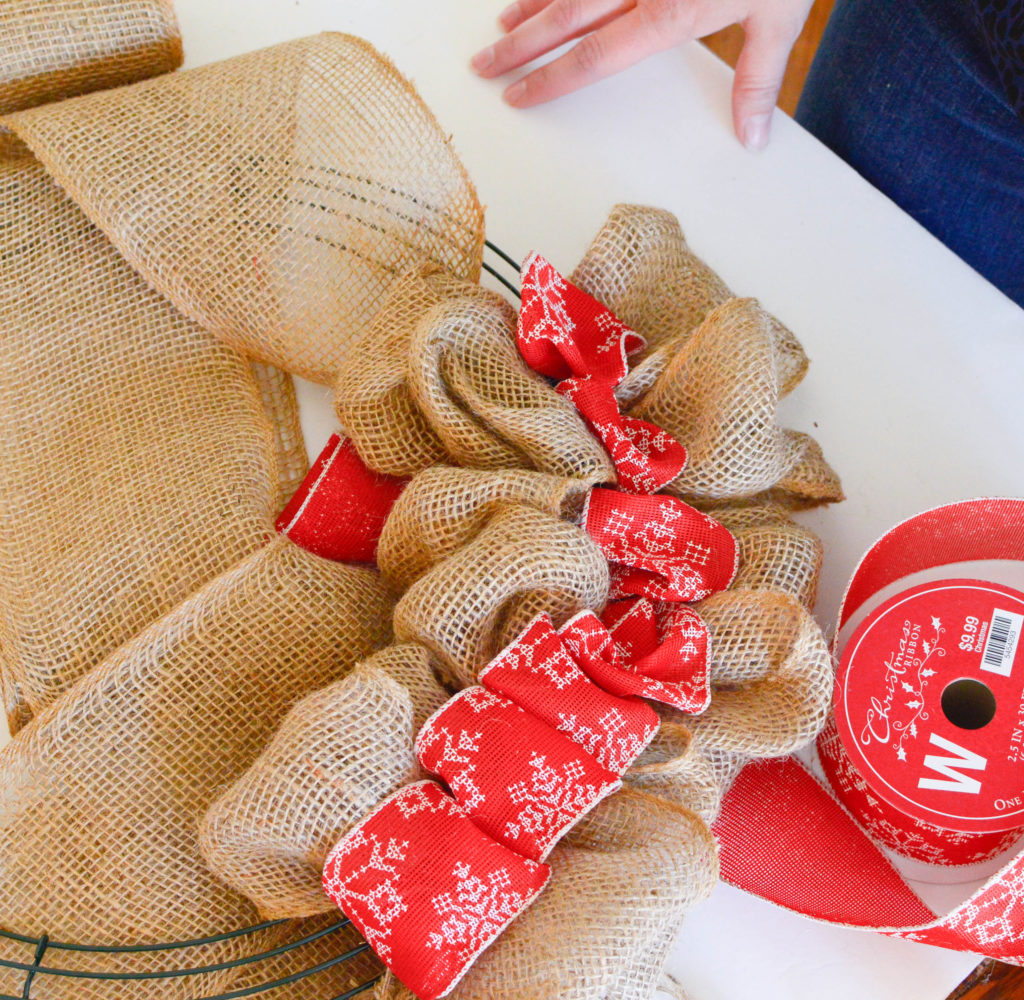
#4 Continue working your way around the frame creating loops on the front and braiding the pieces on the back.
Make sure to check the front after every set of loops your create. You will need to make sure that all of your loops are about the same size so that you don’t end up with a lopsided wreath.
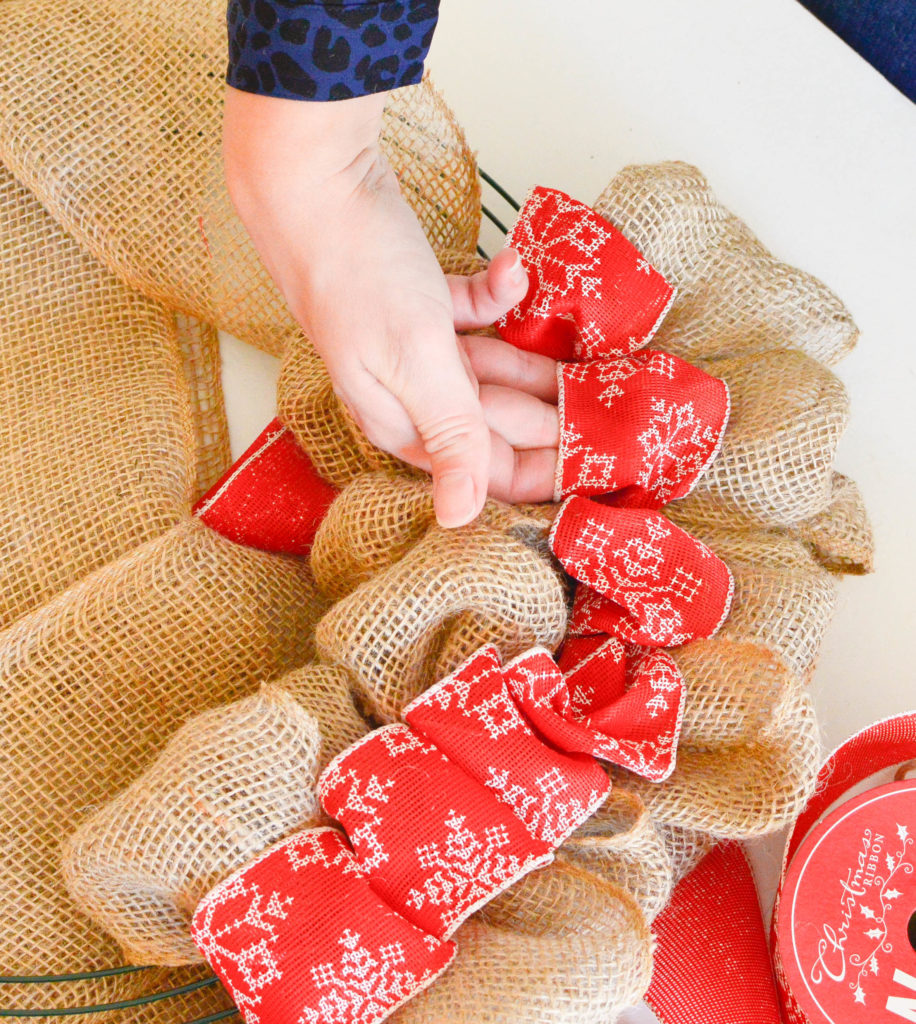
#5 Fluff the loops as you work your way around.
You will probably find as you go along that the pieces you are pushing through the frame aren’t all very full. They may look flat and lopsided like the picture below.
Just use your fingers to fluff them up and create full wreath.
Note: Depending on how you store your seasonal wreaths when not in use, you may have to re-fluff them when you pull them out for the next season.
#6 Once you get to the end, clip the ends of the ribbon and burlap with scissors.
Make sure to leave ~8 inches or enough to tie a knob.
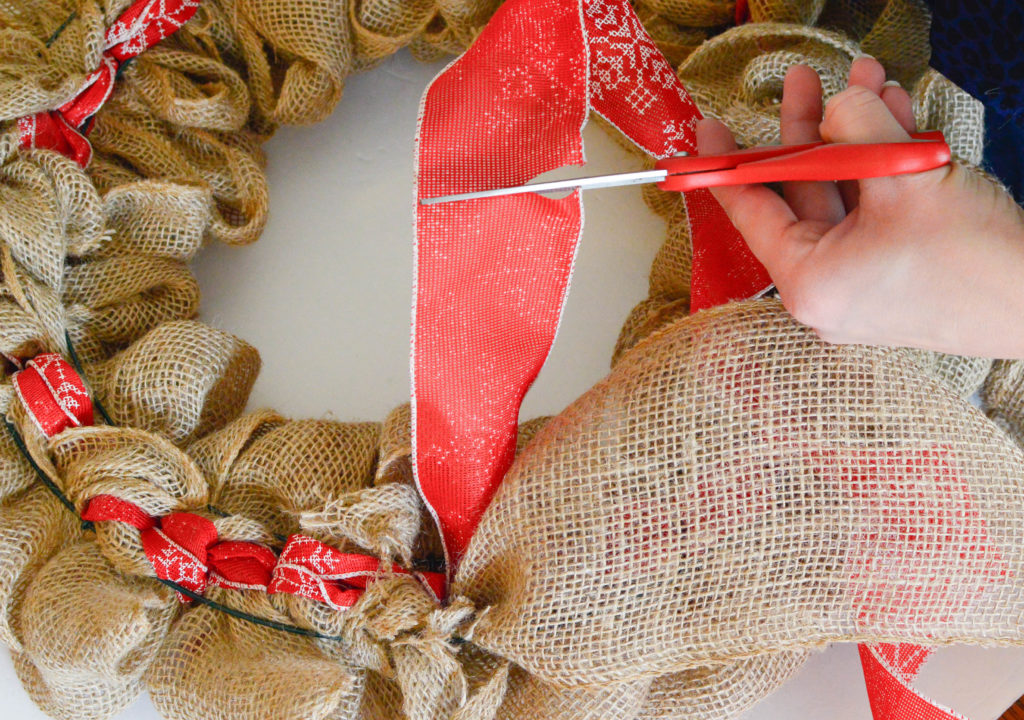
Tie the two pieces together into a tight knot. Then clip the ends off so they don’t stick out and show from the front.
Christmas Burlap Wreath
#7 Hang your wreath on your door!
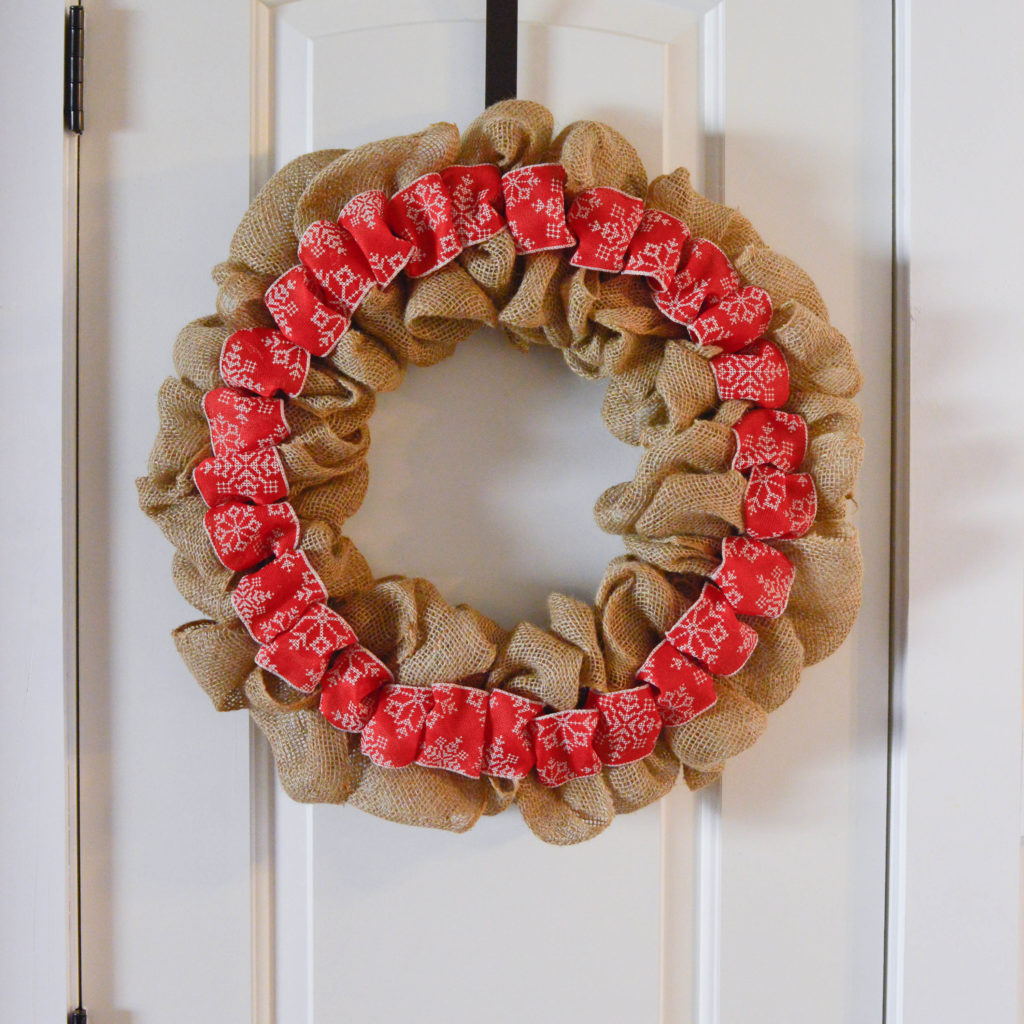
Burlap wreaths aren’t hard and the certainly don’t have to break the bank! While I love scouring the web for beautiful farmhouse style home decor, I’m usually not a big fan of the prices I see. But if you just put in a little time and effort, you can DIY so many things!
I hope you’ve enjoyed this tutorial! If you make a burlap wreath using this tutorial, I’d love to see it! Please share it in the pictures below or shoot it to my email!
What have you DIYed lately?
{This post may contain affiliate links. See our disclosures here.}